You are here
Frequently Asked Questions - WATER Alert
If you need to reset your WATER Alert to the factory settings or simply need to re-configure it to use another WiFi router, you need to erase old WiFi information first. How is it done?
If you need to move the Water Alert to another location or simply need to re-configure it to use another WiFi network, you need to delete the information already stored there. To do that, follow steps below:
- Unplug it from the power outlet and remove cover
- Locate and push the CLEAR button. While keeping the CLEAR button depressed, plug your device back in A/C outlet
- Release the CLEAR after 15 seconds
Your device is ready to be configured with a new WiFi network.
You are holding a Myspool Water Alert in your hands. How do you configure it with your phone number and email and let it know how to access the internet to transmit alerts?
- Connect your device to WiFi
- Plug it into A/C outlet. FIll a cup halfway with water. Place the sensor pad in the water for 30 seconds. Wipe it dry.
- Create a new account on myspool.com and click on email link to confirm it or login to your existing account
- Confirm your email subscription for this device to receive alert notifications
You are done: trigger an alert from your device again by dipping the pad in the water for 30 seconds and receive an email notification!
You can calibrate your WATER Alert to be more or less sensitive, depending on your requirements. For example, when placed near a sump pump, you may want it to be less sensitive. On the other hand, when placed near a hot water tank or a humidifier, you can increase the sensor sensitivity.
Calibration Steps
-
Pry open the lid off the black enclosure or unscrew the lid from the rugged enclosure.
-
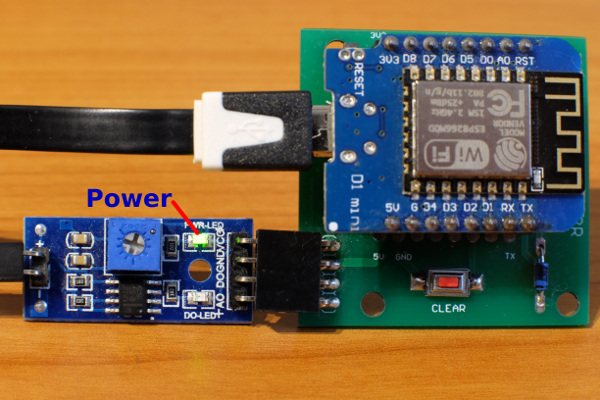
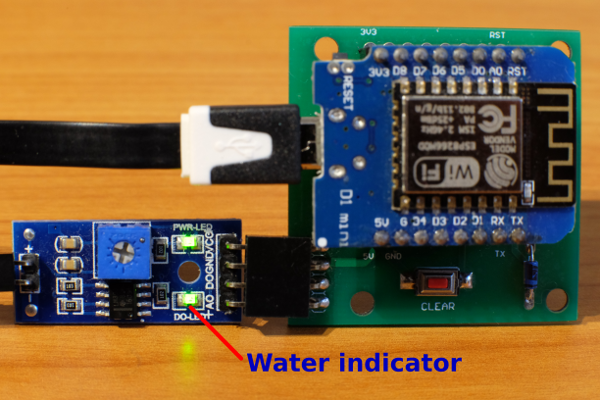
Plug the WATER Alert into a power outlet. Locate a small circuit board with a tuning screw and two green led lights. One of them is a power indicator and must be on at all times.
-
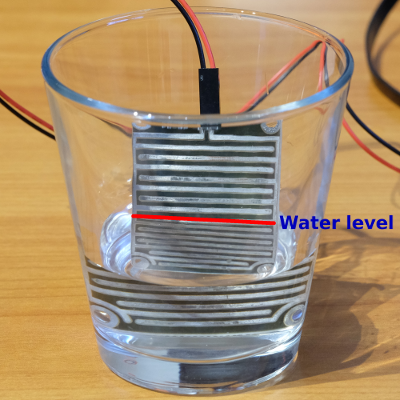
Put the sensor pad in a cup of water. If you want your device to be more sensitive, make sure only half of the pad is immersed in water.
If you want your device to be less sensitive, make sure 3/4 of the pad is covered by water.
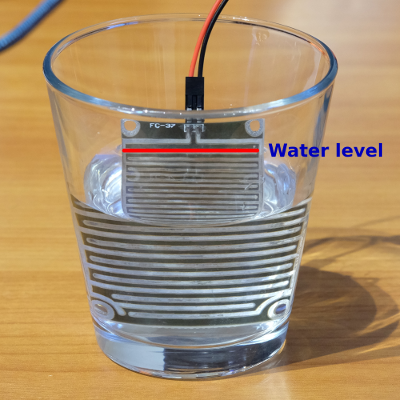
Also make sure the sensor pad connectors are not in the water during calibration. The small board should now light up two green lights.
-
Turn the tuning screw (a potentiometer which is a square plastic part next to the green light) counter clockwise until one of the green lights is off.
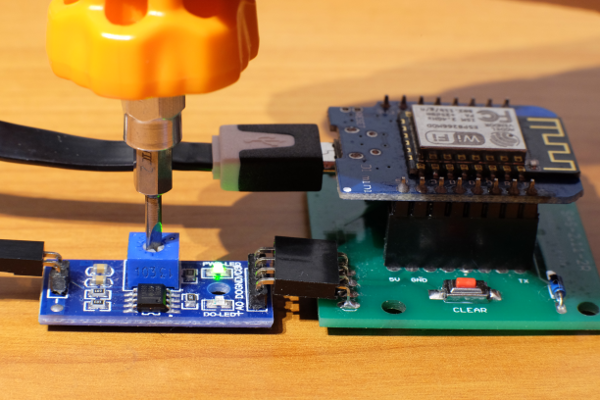
-
Turn the tuning screw clockwise notch by notch until second light goes on. Make sure you are turning the screw very slowly.
-
Take the sensor pad out of the water and dry it with a paper towel.
-
If the second light goes off you are done, otherwise turn the screw counter clockwise just a notch and repeat the process.
Note: if device is adjusted to be less sensitive, the second green light should go off the moment the sensor pad is taken out of the water - without drying it with paper towel.
1. Remove the cover from the WATER detector, either by removing the four screws from the lid or by prying off the lid from the black box with a flat screwdriver.
2. Unplug the mositure sensor wire going to the blue circuit board as shown here: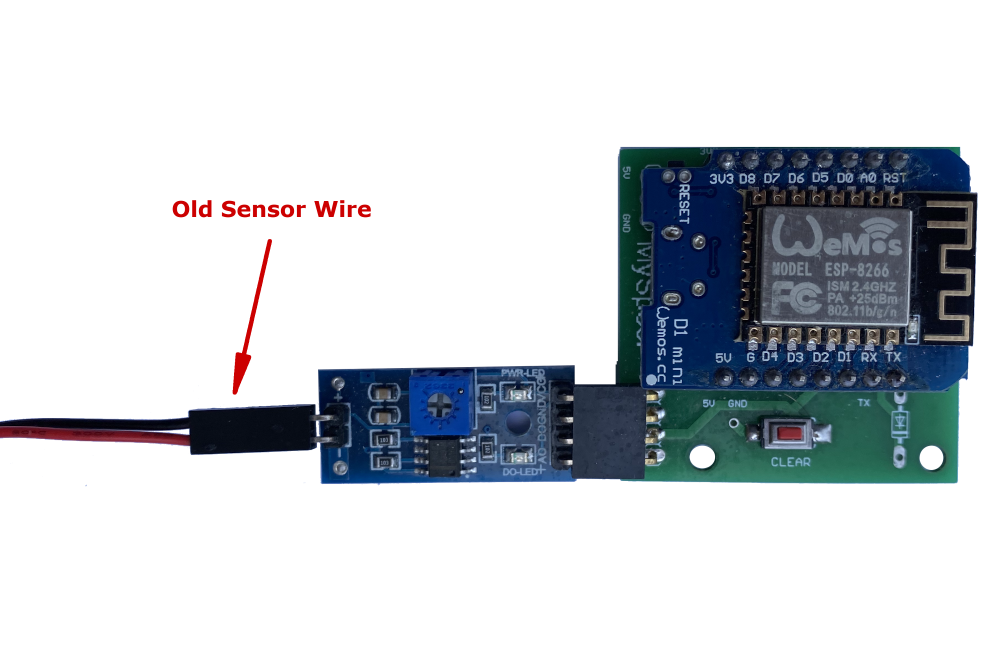
3. Plug the float switch connector into the blue circuit board instead: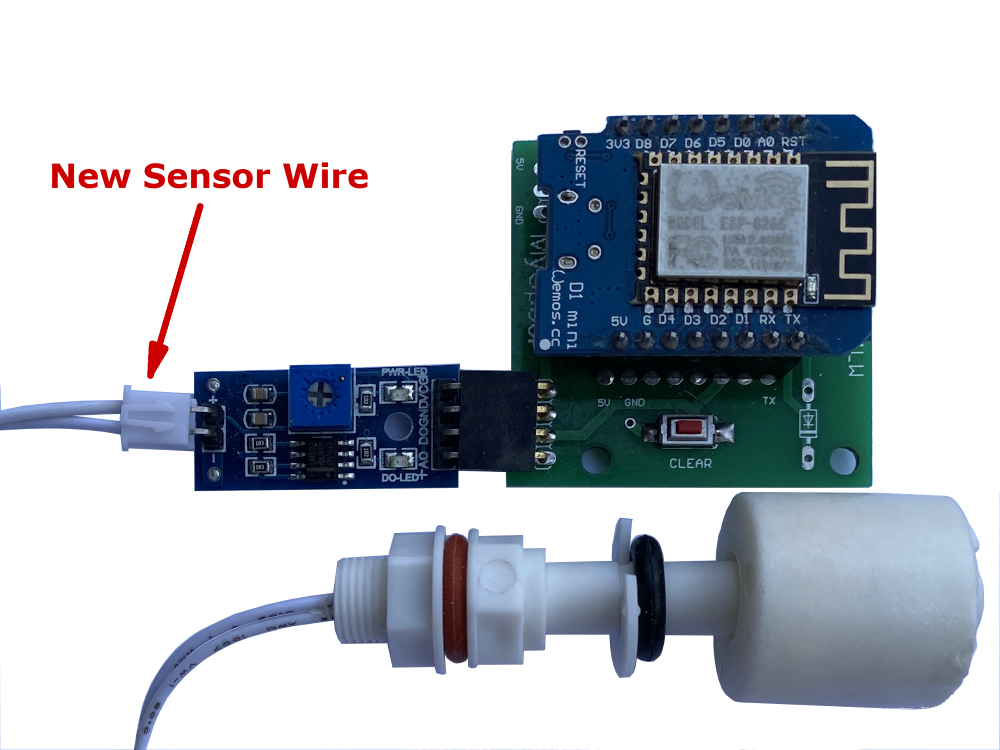
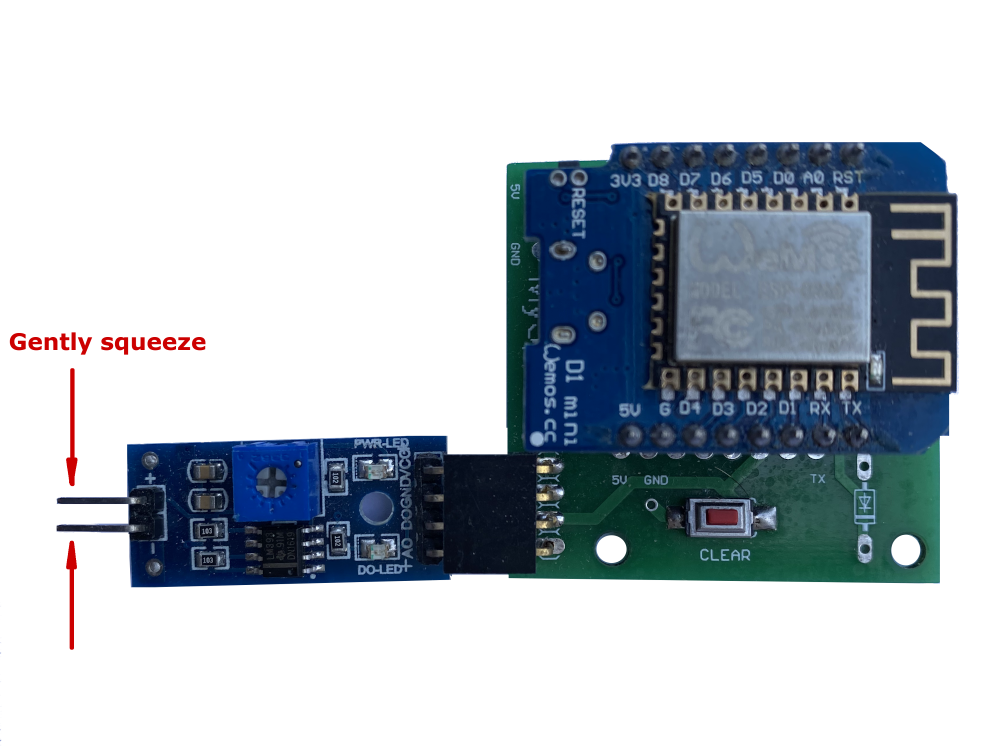
4. You may need to force the connector onto the board or gently squeeze the two pins on the board as shown below and try again