
How to install a MAILBOX Alert
Before you go outside and connect your MAILBOX Alert to your mailbox, please make sure these configuration steps are completed:
1. Your MAILBOX Alert is Registered as your device.
2. Your MAILBOX Alert is Configured to send you notifications via email, text message, or both.
3. Your MAILBOX Alert is setup to use your WiFi. For information on how to do that please refer here.
The sample installation of MAILBOX Alert that we will describe assumes that your mailbox is mounted on a wooden post. Please modify as individual circumstances will vary.
The weatherproof plastic box is mounted outside the mailbox, on a post.
Step 1. Use 2 wood screws included and mount the weatherproof plastic box so that its bottom is at the same level as the bottom of the mailbox.
Step 2. Using a phillips screwdriver take out four screws holding the plastic box together. Inside you will find a battery holder and a circuit assembly. Put the lid with the 4 screws to the side for now. You should see something like this:
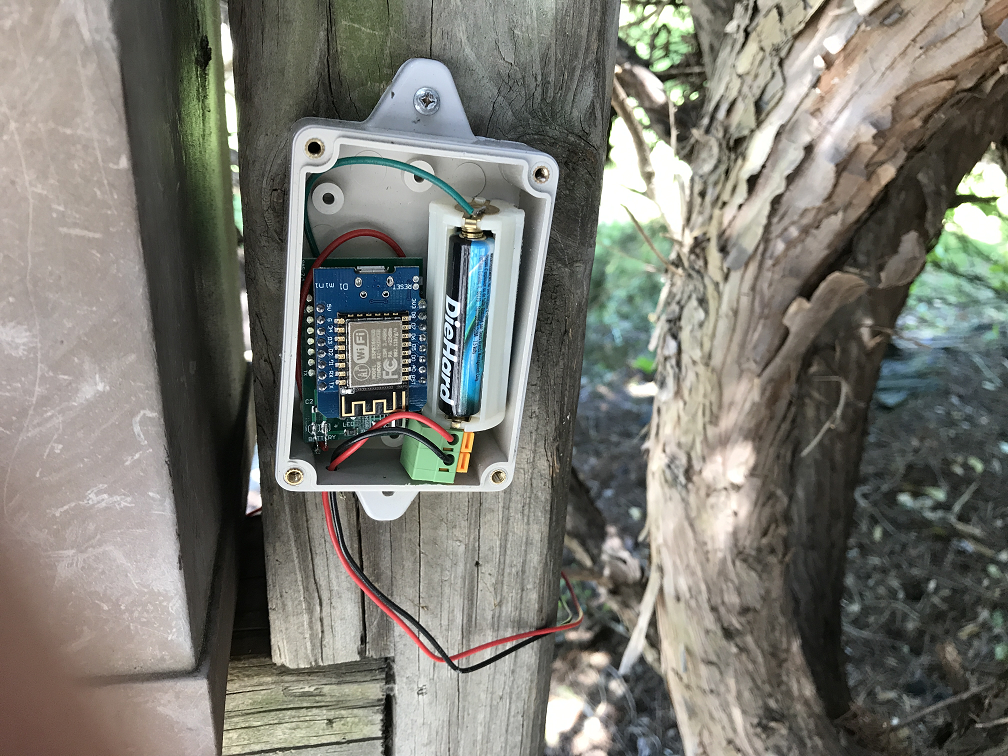
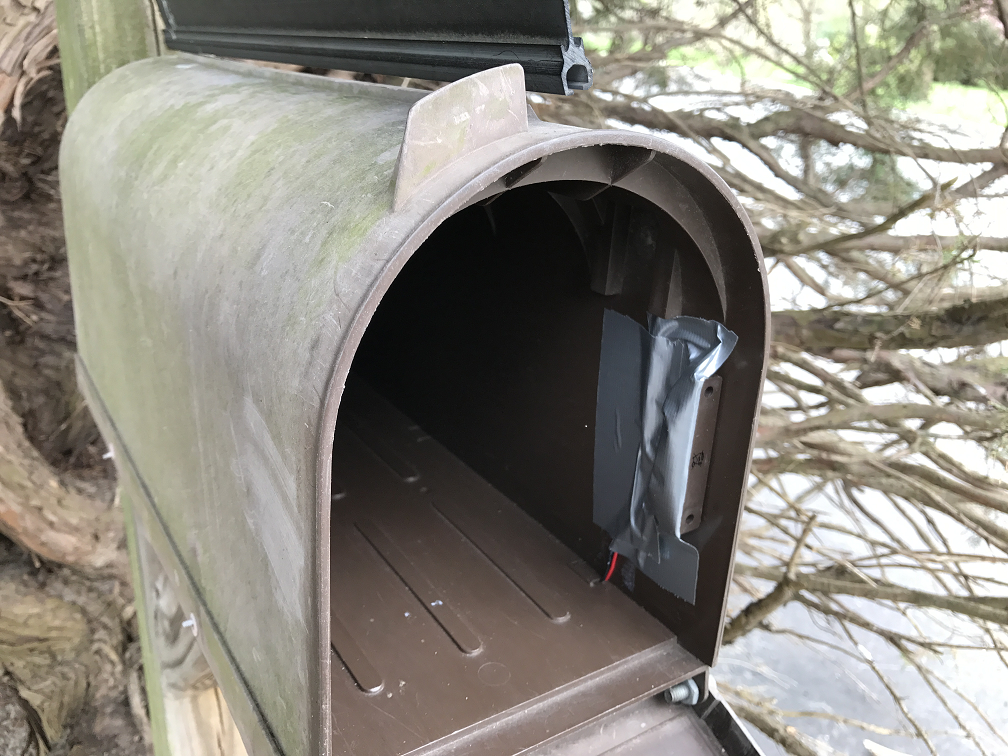
Note: the actual mailbox sensor consists of two plastic pieces, one a magnet that goes on the lid, and the other one with two wires connected to the plastic box outside. The magnet gets affixed to the lid with an industrial strength double sided tape, included. The magnet gets mounted last.
Step 3. Using the included industrial strength double sided tape, attach the magnetic sensor part with wires and screws to the side of the mailbox that is facing the lid, so that the two parts of the magnetic sensor get very close to each other when the mailbox is closed.
Note: the two wires, from the screws marked COM and OPEN, need to go out to the plastic box outside. There is a green connector in the box, called screwless connector. If you push in the two yellow levers and stick the wires from the sensor in the holes, the wires will be held in place when you release the levers.
Step 4. Run the two wires from the magnetic sensor inside the mailbox to the plastic box outside and connect them to the green connector inside. Turn on the power switch and receive an email alert and or text message. Test the sensor by moving the magnet piece close to the sensor to simulate mailbox closing.
Step 5. Once you are sure all is working, attach the magnet to the mailbox lid using the double sided tape. Close the lid. You may also want to cover the screws and the wires inside the box with duct tape, as show here:
Step 6. Using the 4 screws removed in Step 2, close and fasten the plastic box lid securely.
Open the lid again to test your MAILBOX Alert. Please remember that the default portal setting of 5 minutes limits the number of text messages sent during that interval. In other words, you may need to wait for 5 minutes to get another text message.